If you're a motorcycle enthusiast, you know the importance of having a reliable electrical system. However, with so many wires and components, it can be challenging to troubleshoot issues and make repairs. One crucial component of a motorcycle's electrical system is the CDI, or Capacitor Discharge Ignition, system. The CDI plays a vital role in starting your motorcycle, as it regulates the electrical charge that goes to the spark plugs.
Many motorcycle owners have faced issues with their CDI wiring, making it difficult or impossible to start their bikes. This can be a frustrating experience, and it's essential to have a basic understanding of CDI wiring to make repairs.
The target of Yamaha CDI wiring diagrams is to help motorcycle owners troubleshoot and repair issues related to their CDI wiring. These diagrams show the exact routing of wires, which parts are connected, and where they are located, making it easier to diagnose and repair problems.
In summary, Yamaha CDI wiring diagrams are essential for anyone who wants to troubleshoot and repair problems related to their motorcycle's CDI wiring. By following these diagrams, you can save time and money, as well as gain a better understanding of your bike's electrical system.
Understanding CDI Wiring Diagram Yamaha
When I first purchased my Yamaha motorcycle, I had no idea how to troubleshoot or repair electrical issues. However, after experiencing problems with starting my bike, I decided to learn more about CDI wiring diagrams.
After researching online, I came across multiple Yamaha CDI wiring diagram examples. These diagrams made it easy for me to understand my bike's electrical system, and I was eventually able to diagnose and repair the problem with my CDI wiring.

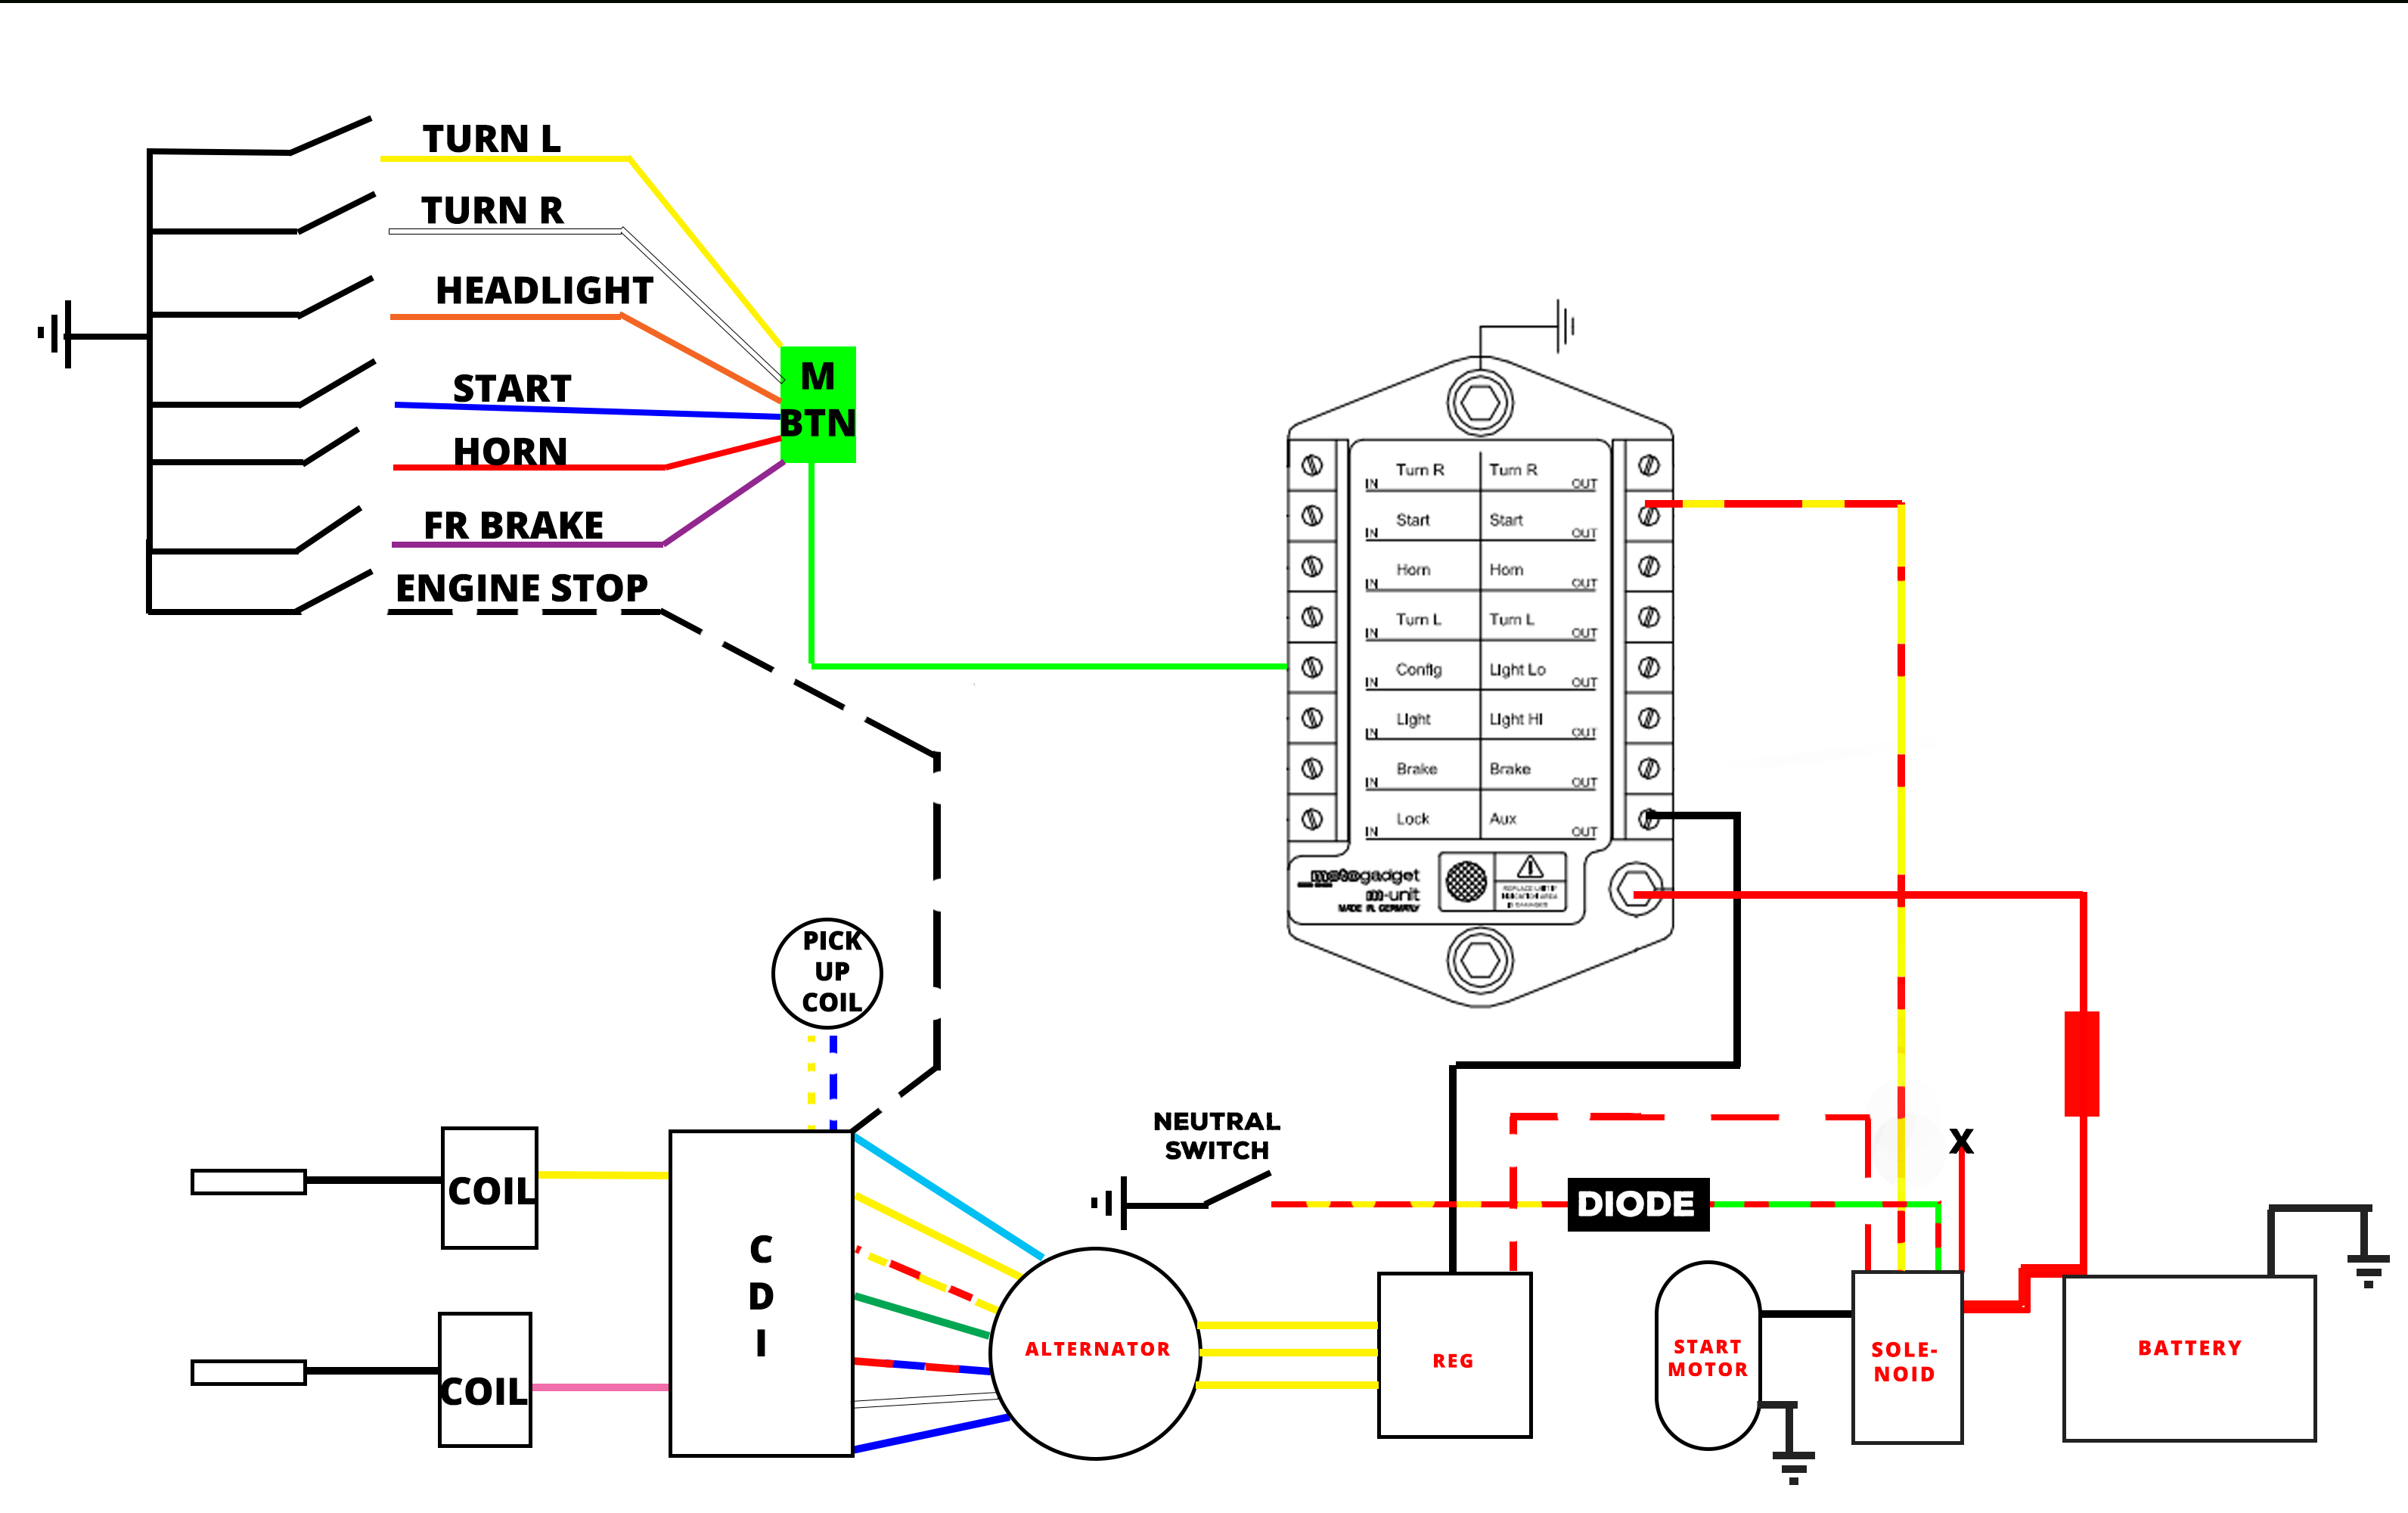
One example of a Yamaha CDI wiring diagram is the Yamaha RS 100 CDI Wiring Diagram shown above. This diagram shows the wiring connections for the CDI unit, coil, oil level switch, and ignition switch. The diagram helps motorcycle owners understand how all the components are connected and how they interact with each other.
Troubleshooting CDI Wiring Diagram Yamaha
While CDI wiring diagrams are helpful for understanding a motorcycle's electrical system, they're even more useful for troubleshooting issues.
For example, if you're experiencing issues with starting your bike, you can use a CDI wiring diagram to check for any loose connections, damaged wires, or faulty components. By following the diagram step by step, you can pinpoint the exact location of the problem and make necessary repairs.
Wiring Connections
A CDI wiring diagram also helps owners understand the proper wiring connections required for their particular model of motorcycle.
For example, the Chinese ATV CDI Box Wiring Diagram shown above illustrates the wiring connections for a standard Chinese ATV CDI. By following the diagram, owners can replace or repair their CDI box easier and avoid damaging any surrounding components.
Proper CDI Wiring
The proper wiring of a CDI system is critical for the function of your motorcycle. Remember, the CDI system is responsible for regulating the electrical charge that goes to your spark plugs, and any miswiring may result in starting issues, misfires, or even engine failure.
Question and Answer
Q: What is a CDI box?
A: A CDI (Capacitor Discharge Ignition) box is an electrical unit that regulates the electrical charge going to the spark plugs to ignite the engine.
Q: What are some common issues related to CDI wiring?
A: Common issues related to CDI wiring include starting issues, misfires, and engine failure.
Q: How do I repair faulty CDI wiring?
A: To repair faulty CDI wiring, consult a CDI wiring diagram to locate the faulty component or loose wire. Once you identify the problem, you can replace or repair the part as necessary.
Q: Why is it essential to properly wire a CDI system?
A: Proper wiring of a CDI system is crucial because it regulates the electrical charge that goes to the spark plugs. Miswiring may result in starting issues, misfires, or even engine failure.
Conclusion of CDI Wiring Diagram Yamaha
Yamaha CDI wiring diagrams are an essential tool for motorcycle owners who want to troubleshoot and repair issues related to their CDI wiring. By following these diagrams, owners can diagnose problems more quickly and make necessary repairs, saving them time and money in the long run.
Gallery
Yamaha Cdi Ignition Wiring Diagram / DC-CDI Schematic (updated) | Techy
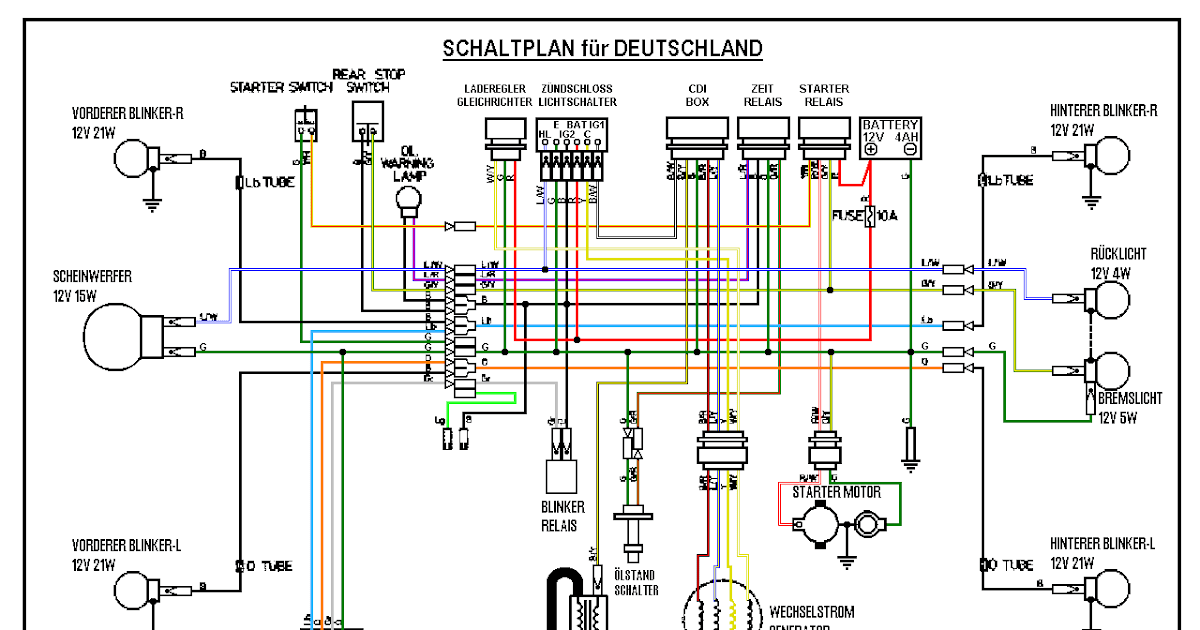
Photo Credit by: bing.com / cdi ignition
Yamaha Rs 100 Cdi Wiring Diagram
Photo Credit by: bing.com / yamaha wiring diagram cdi 100 rs motorcycle series stroke induction torque rst known also
Wiring Diagram For Chinese Atv Efcaviation Com Best Of 110Cc And - Cdi
Photo Credit by: bing.com / cdi wiring diagram atv cx500 unit button box motorcycle chinese circuit ignition data 1980 110cc schematic
90-93 Yamaha Sj650 Cdi Wiring Diagram
Photo Credit by: bing.com / cdi fn8 waverunner rectifier ignition combined
Yamaha Dt 125 Cdi Box Wiring - Wiring Diagram Schemas

Photo Credit by: bing.com / wiring yamaha diagram cdi dt box qt50


